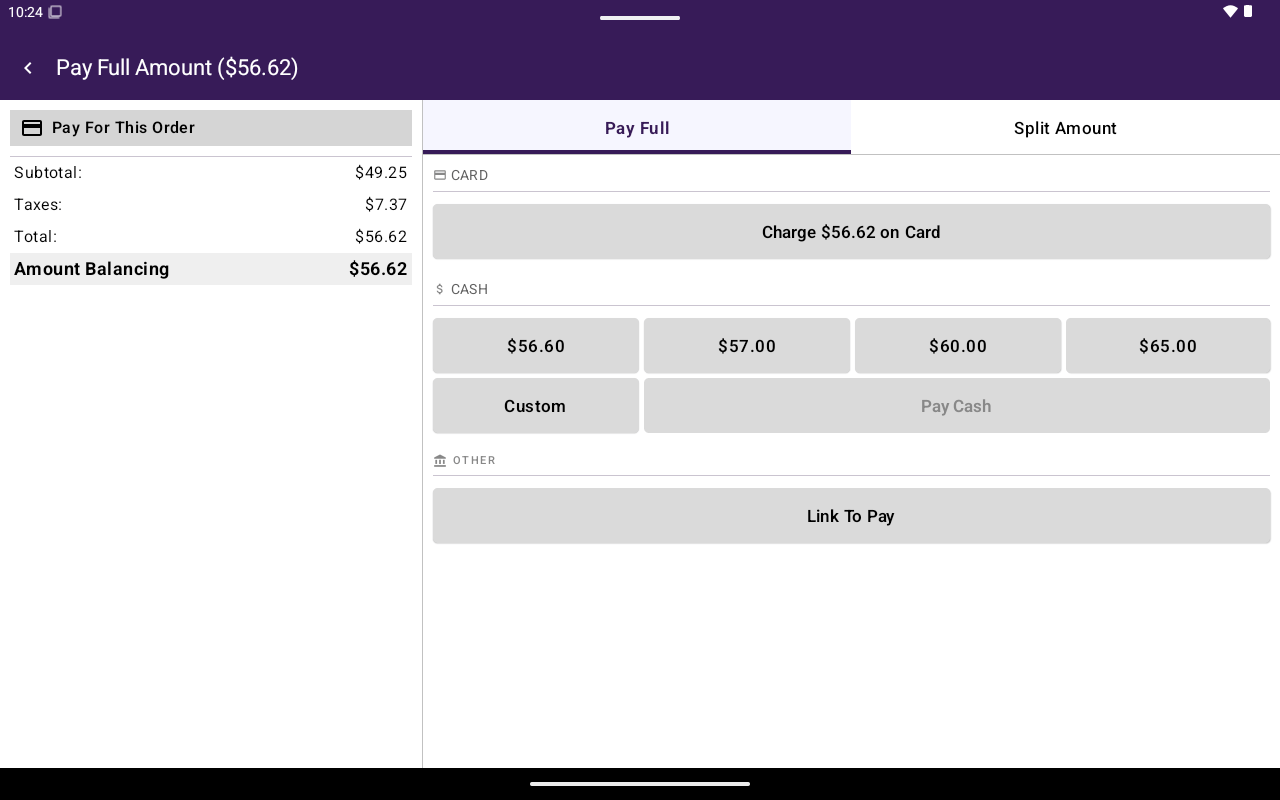
Payment screen with Pay Full / Split Amount and card/cash options.
How to get here
- Build an order in Register (Open Sale or Menu/Catalog).
- Tap Pay.
- Or, on a table order, open a guest’s options and tap Pay to collect that guest’s balance only.
Pay Full or Split Amount
On Split Amount, choose a preset such as Full Amount, N Ways, or Custom, then take payment for the selected portion. After a successful split payment you can take the Next Payment, or Pay More Later.
Card payment
1
Choose card
Tap the card charge option shown for your merchant (for example charge on Card, Credit, or Debit).
2
Complete on the terminal
Follow the on-device prompts. If tips are enabled in Taliup HQ, the customer may see Add a Tip with presets, No Tip, or Custom.
3
Finish
Wait for approval. Taliup POS posts the payment and may ask how the customer should get a receipt.
Cash payment
1
Choose cash
In the Cash section, pick a tender preset or tap Custom.
2
Enter cash received (custom)
On the custom keypad, confirm total sale amount, cash received, and Change Due. Use Exact for exact tender if needed, then Pay Cash.
3
Confirm
Confirm the cash payment when prompted (Confirm Cash Payment / Confirm Payment).
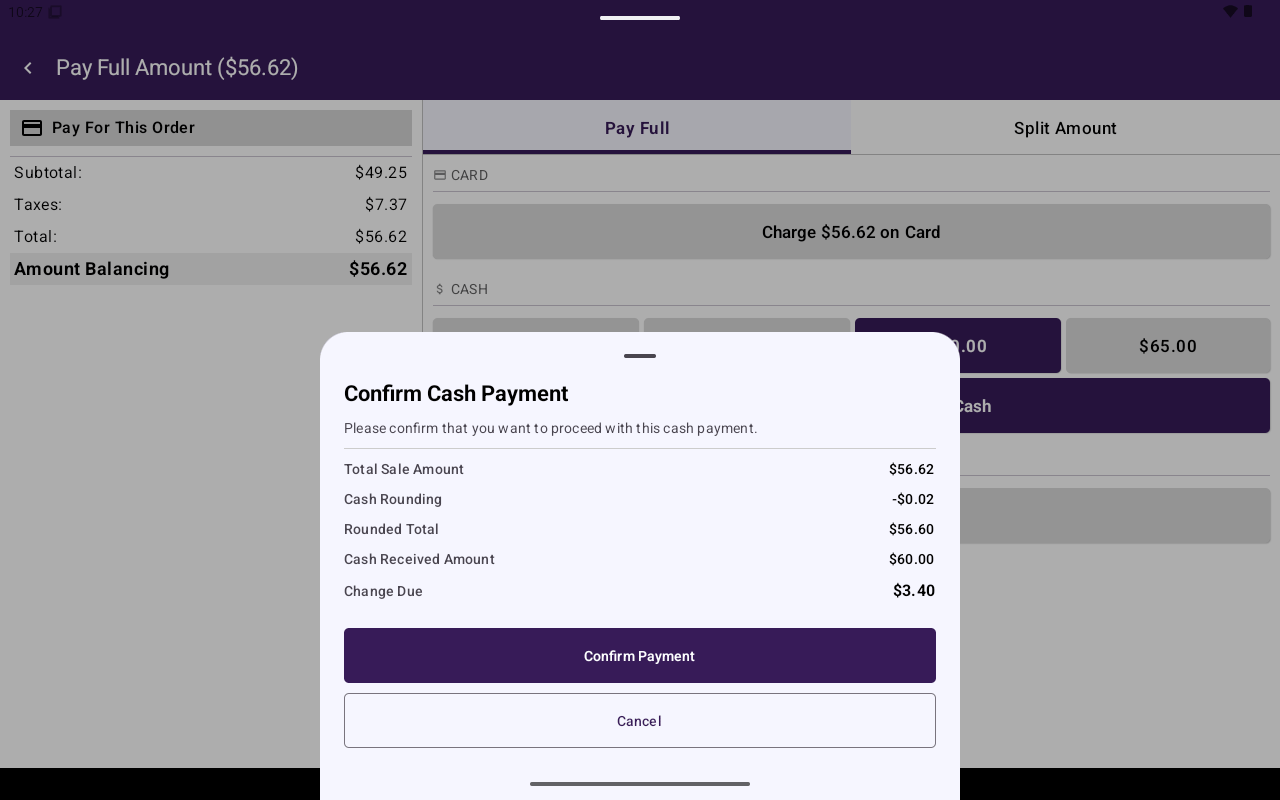
Cash tender screen showing change due.
Other methods
When enabled for the merchant, the payment screen may also show:- EBT
- Link To Pay
After payment
Depending on settings and order type, you may see:- Send To Kitchen Printer — send items to kitchen printers. Set those printers up under Settings → Printers. When Send order to external printer after payment is on, this happens automatically.
- Choose customer receipt — No Receipt, Paper, or Email. See Customer receipt.
- On a split sale, Choose full order customer receipt after the last payment.
- On some table orders, Order Fully Paid or Guest Fully Paid print prompts, unless Skip Fully Paid Receipt Prompts is on.
Related
- Customer receipt
- Cart
- Options side menu — Create Auth, Create Refund, print bill
- Void · Refund