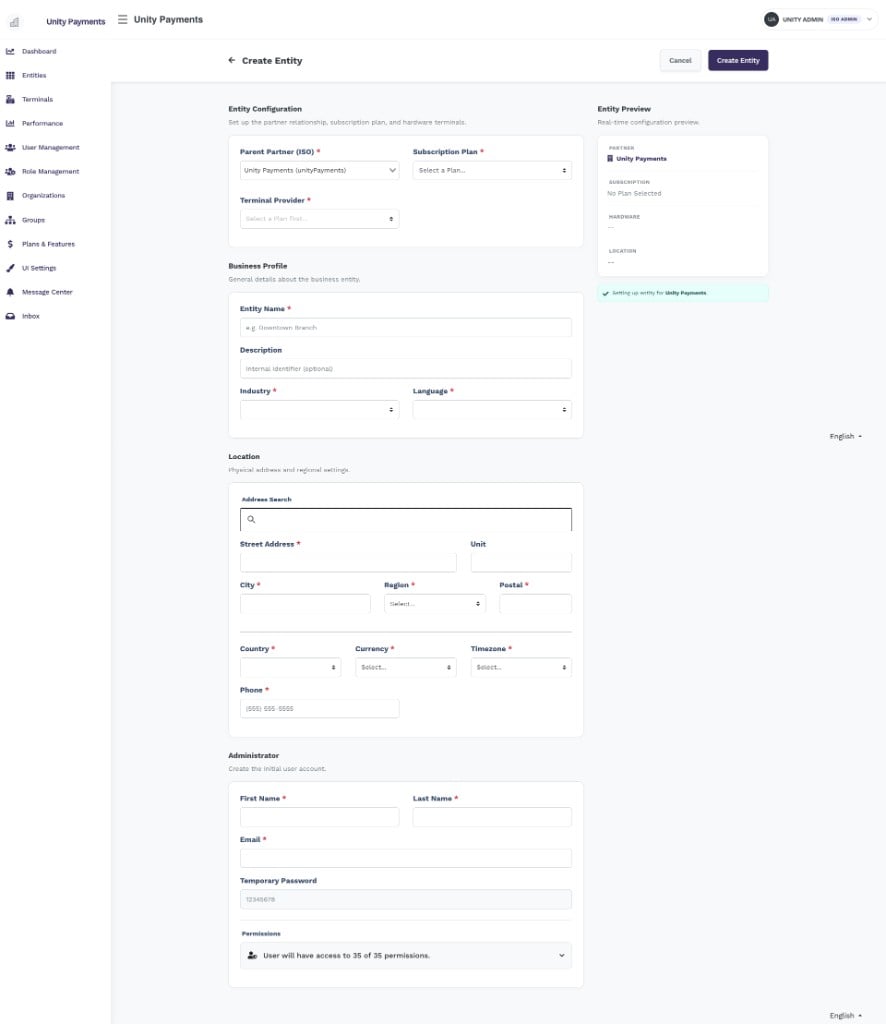
The full Create Entity form in Taliup HQ.
Entity Preview sidebar
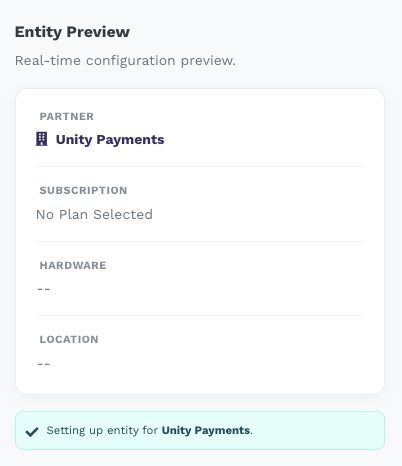
The Entity Preview sidebar updates as you fill the form.
The preview updates with a 700 ms debounce after any configuration change, so it does not flicker while you are actively typing. When a partner is selected, the preview header reads “Setting up entity for [Partner name]”.
If Poynt is the selected Terminal Provider, a Poynt-specific tip appears in the preview reminding you to have your Poynt HQ credentials ready before submitting.
Section 1 — Entity Configuration
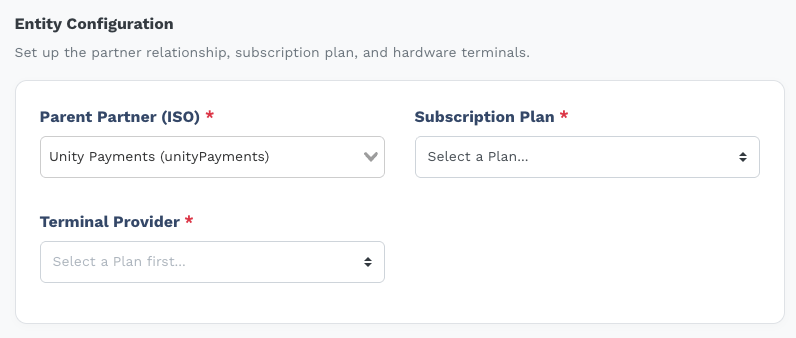
The Entity Configuration section.
No plans found — Missing Configuration modal
If the selected partner has no active subscription plans, a modal appears explaining the issue and offering two options:- Go to Plans & Features — navigates away to create a plan. Before leaving, the form state (including the selected partner) is saved to browser local storage and restored automatically when you return to the Create Entity page.
- Select a different partner — closes the modal so you can choose a different ISO.
Section 2 — Business Profile
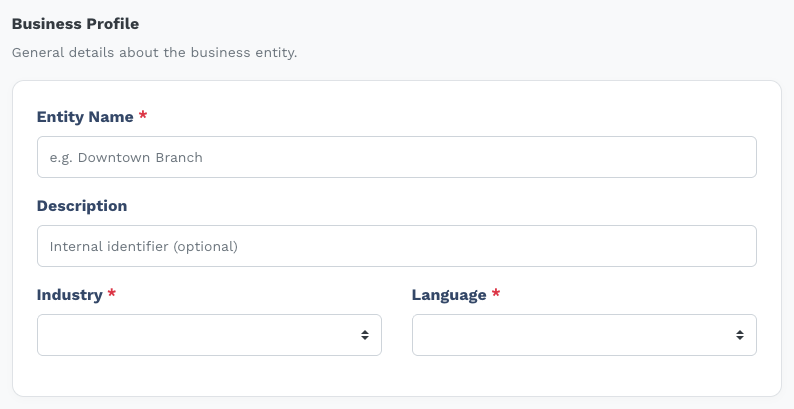
The Business Profile section.
Recapture this screenshot if you want Charity visible in the Industry list. The current image predates that option.
Section 3 — Location
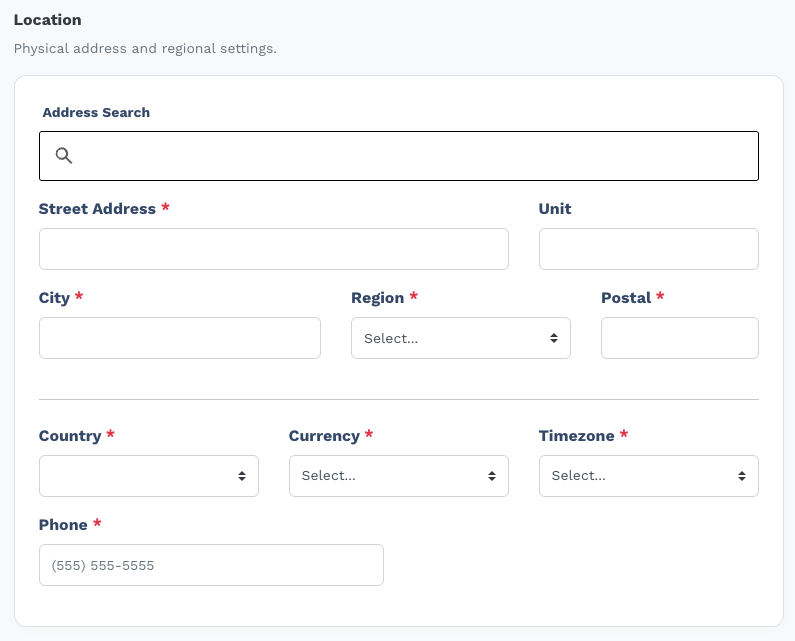
The Location section.
Address Search (Google Maps autocomplete)
Type a partial address in the Address Search field and select a result from the dropdown. Selecting a result auto-fills the following fields:- Street Address
- City
- Country
- Postal code (formatted for the detected country)
- Latitude / Longitude (stored internally for mapping)
- Timezone
Location fields
Section 4 — Technical Configuration
This section appears only when the selected Terminal Provider requires credentials. The fields differ by provider.No screenshot is provided for this section because it only appears after a Terminal Provider is selected and its layout changes per provider.
PAX · Castles · Ingenico · None
Poynt
Express
Section 5 — Administrator
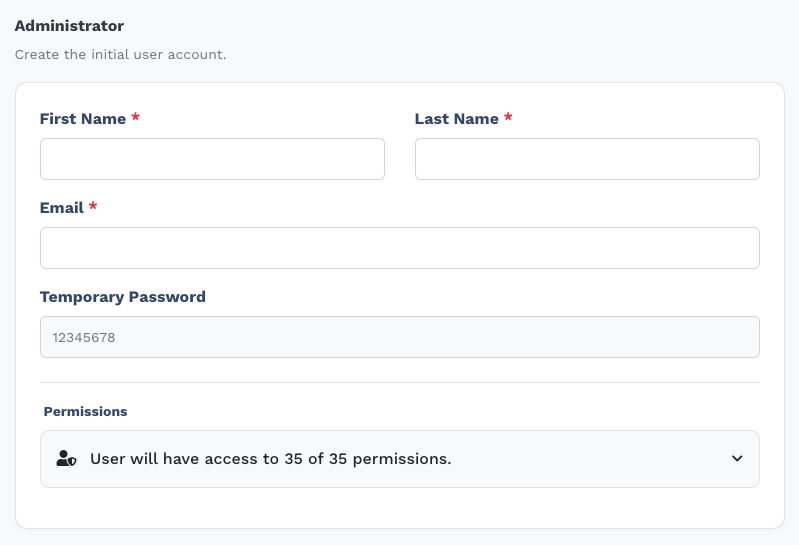
The Administrator section.
Submitting the form
Click Create Entity in the top-right header bar to submit the form.
Clicking Cancel triggers a Discard Changes? confirmation modal before navigating back to the Entities list. Any unsaved form data is discarded.
What’s next
Register PAX Devices
Add the merchant’s payment terminals to Taliup HQ using their TIDs.
Plans & Features
Review or adjust the merchant’s subscription plan and enabled features.
Configure Tips
Set up tip prompts and tip types for payment terminals.
Locations & Online Gateway
Manage the merchant’s physical sites and online payment gateway.