Prerequisites
Three conditions must be met before credentials appear and the feature is usable:Payment provider = Elavon
Feature enabled
Hosted Payment Solution feature must be enabled for the entity. Enable it in Plans & Features.Online Payment Gateway configured
API Credentials
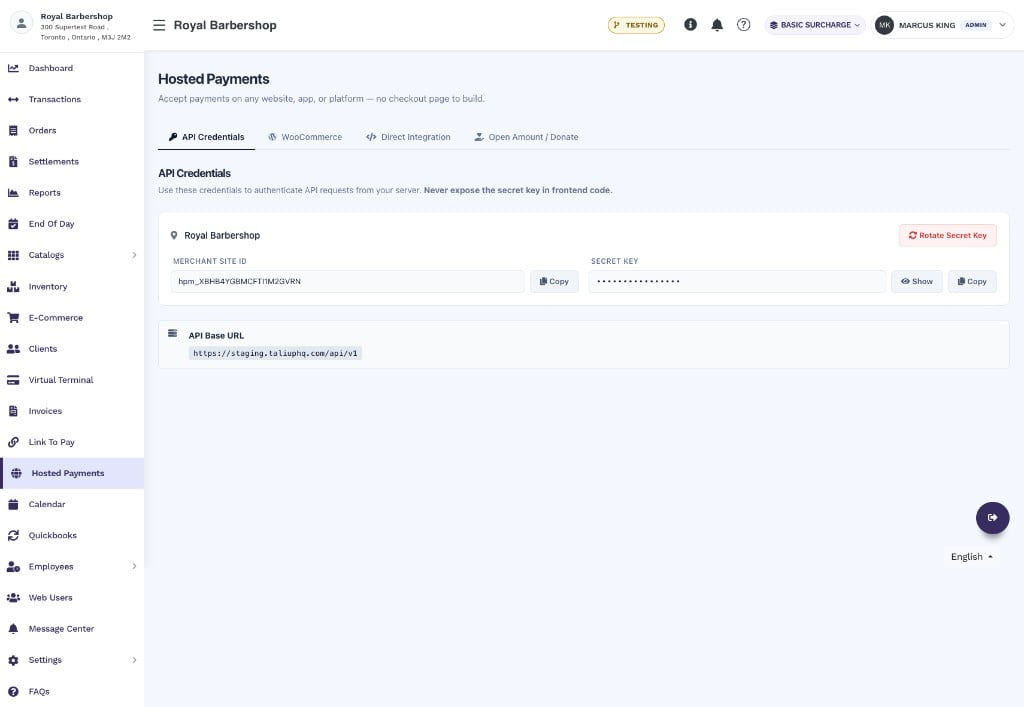
The API Credentials tab — Merchant Site ID, Secret Key, and API Base URL per location.
WooCommerce Integration
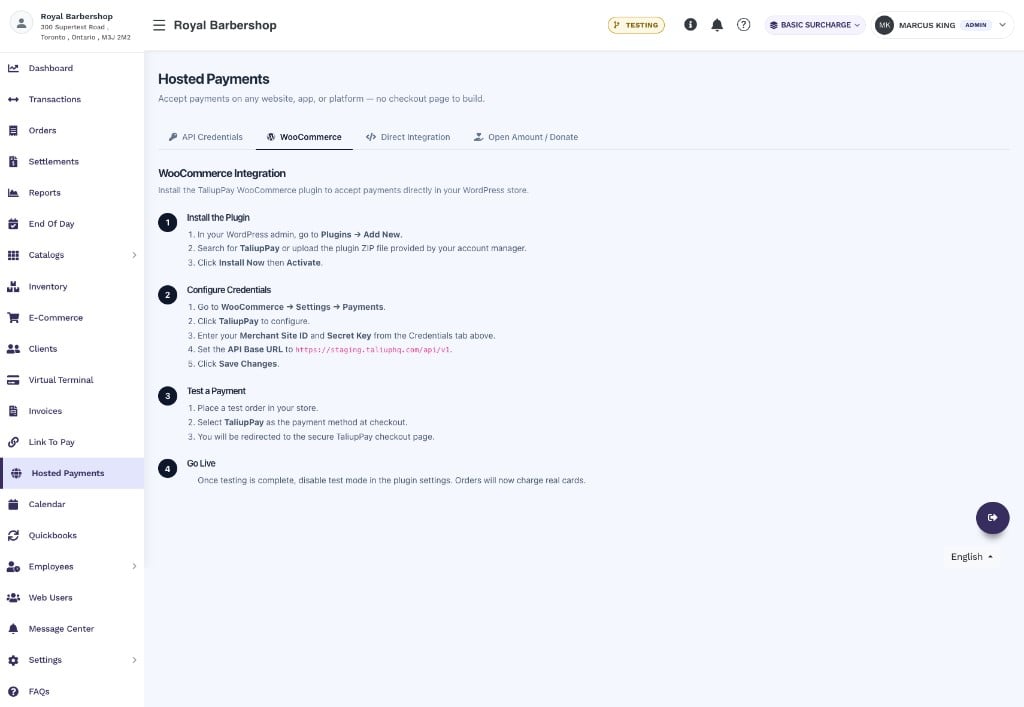
The WooCommerce tab — four-step guide to install and configure the TaliupPay WooCommerce plugin.
Install the Plugin
Configure Credentials
https://taliuphq.com/api/v1. Click Save Changes.Test a Payment
Go Live
Direct Integration
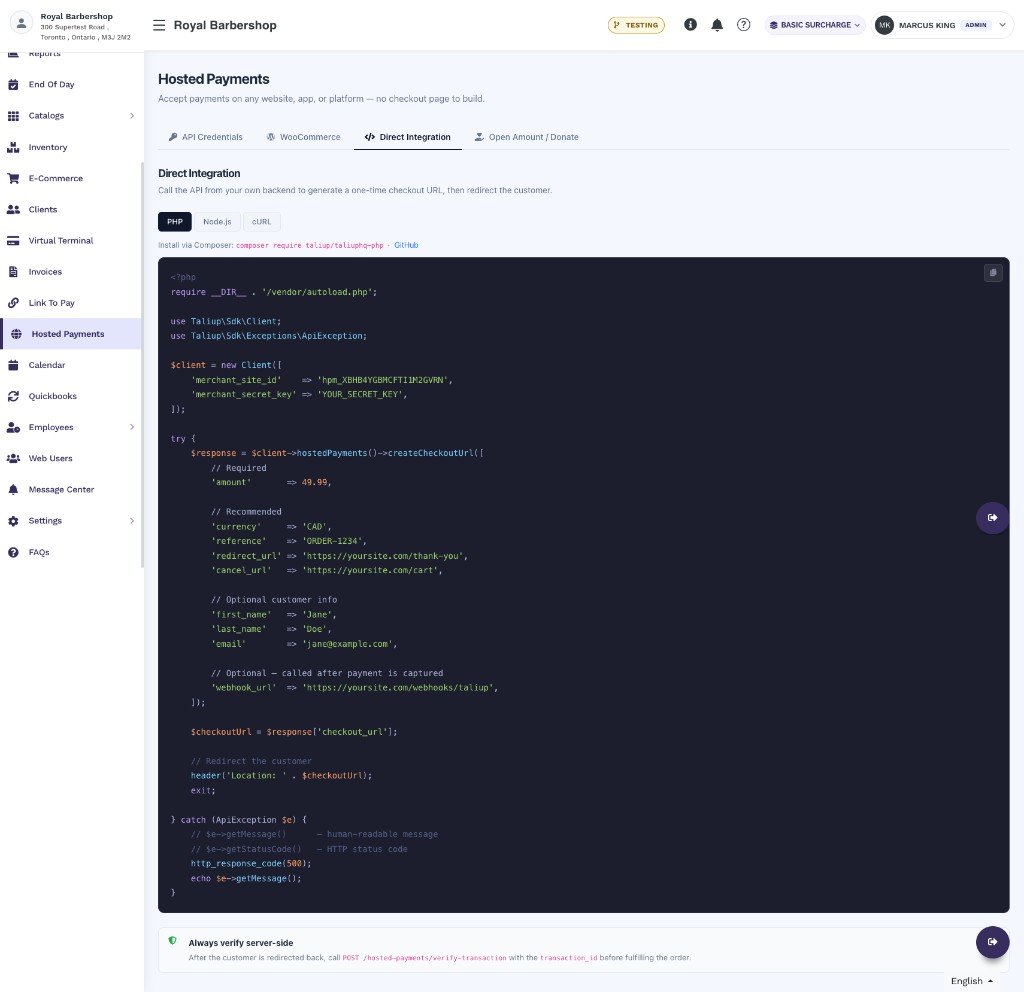
The Direct Integration tab — PHP, Node.js, and cURL code examples for generating a checkout URL from your backend.
Install the PHP SDK
Integration flow
Request fields
Return URL query parameters
After checkout, Taliup redirects the customer to yourredirect_url (or cancel_url) and appends these query parameters:
Verify transaction
Open Amount & Donation Page
The Open Amount & Donation Page lets customers pay any amount they choose — no server-side code required. It is ideal for donations, memberships, tips, or any use case with flexible pricing.How it works
A customer visits a Taliup-hosted landing page (or clicks an embedded button on your site), enters their amount and details, and completes payment. On success:- A Taliup Order is created with status
complete. - A Client record is found by email or created automatically.
- An optional email receipt is sent to the customer.
Charity donation tax receipts
If the entity industry is Charity, the open-amount donation page can send a tax-compliant electronic receipt (English, French, or Spanish). Before the donation page works, complete Charity Details on the entity:- Charity / Registration Number (required)
- Tax ID (optional)
- A complete registered address on the entity profile
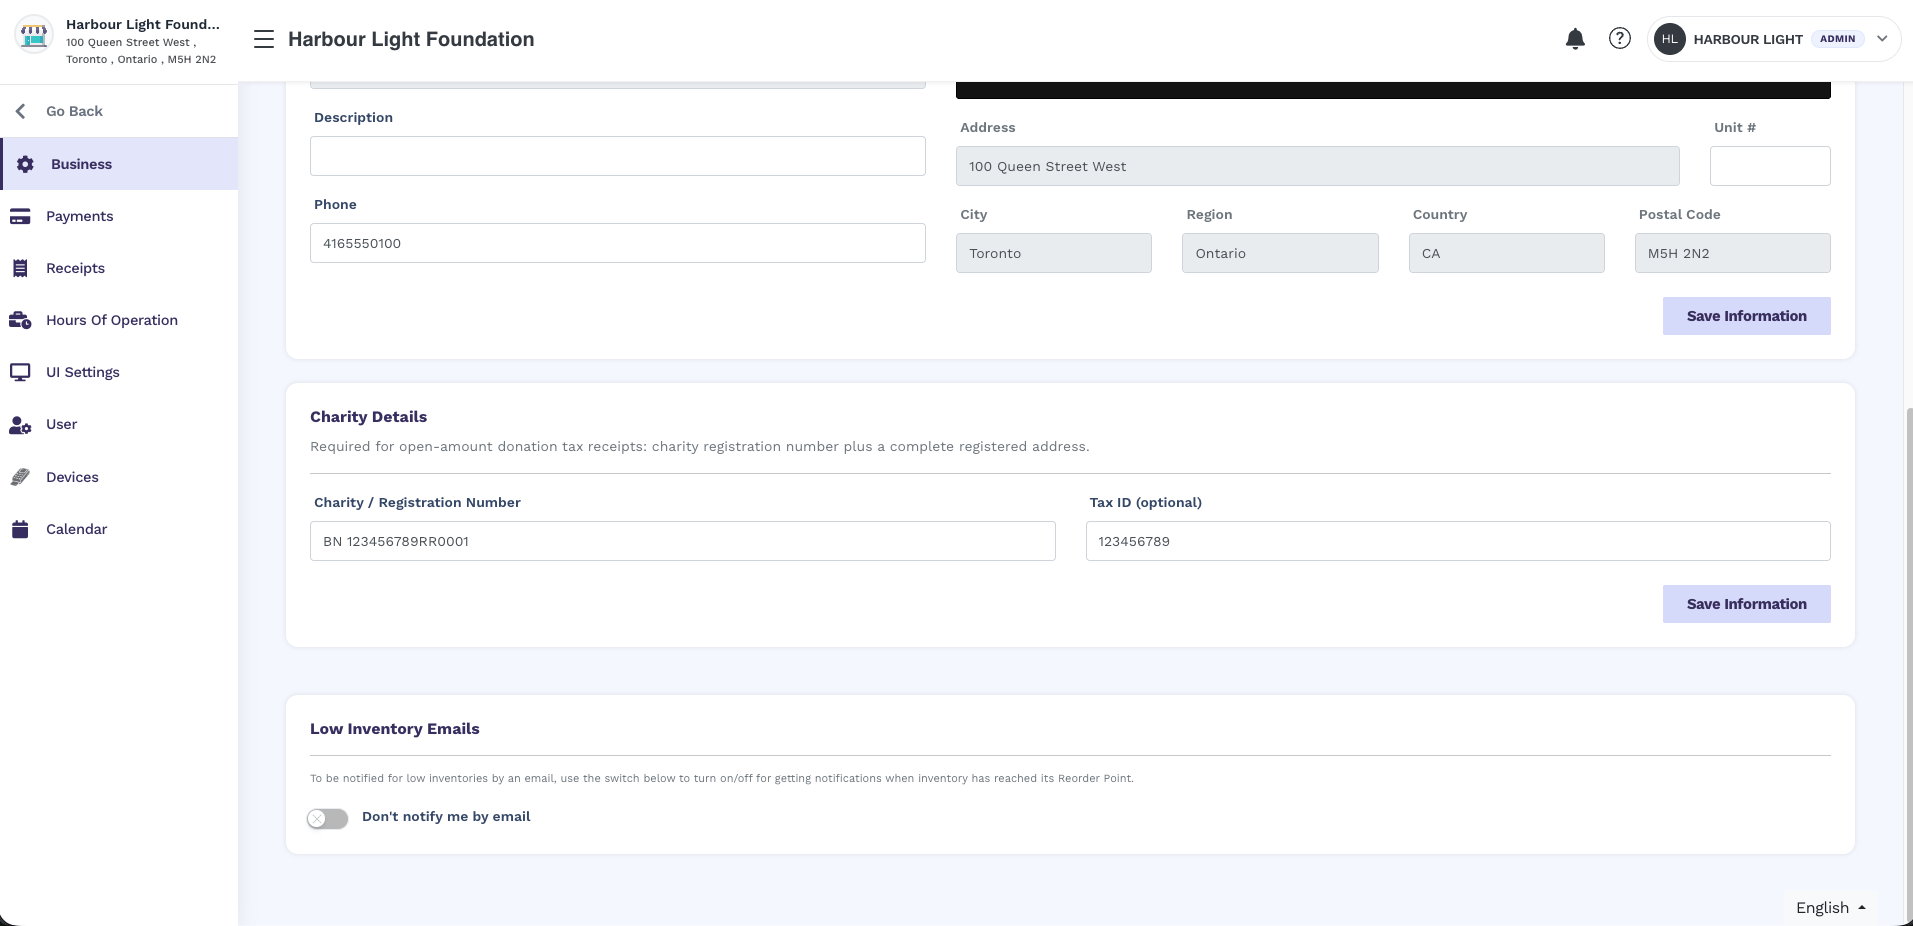
Charity Details on Settings → Business.
View and resend a receipt
After a charity donation is captured, you can open the same tax receipt from Transactions.Open Transactions
Select the donation
View or send the receipt
Embed Snippet
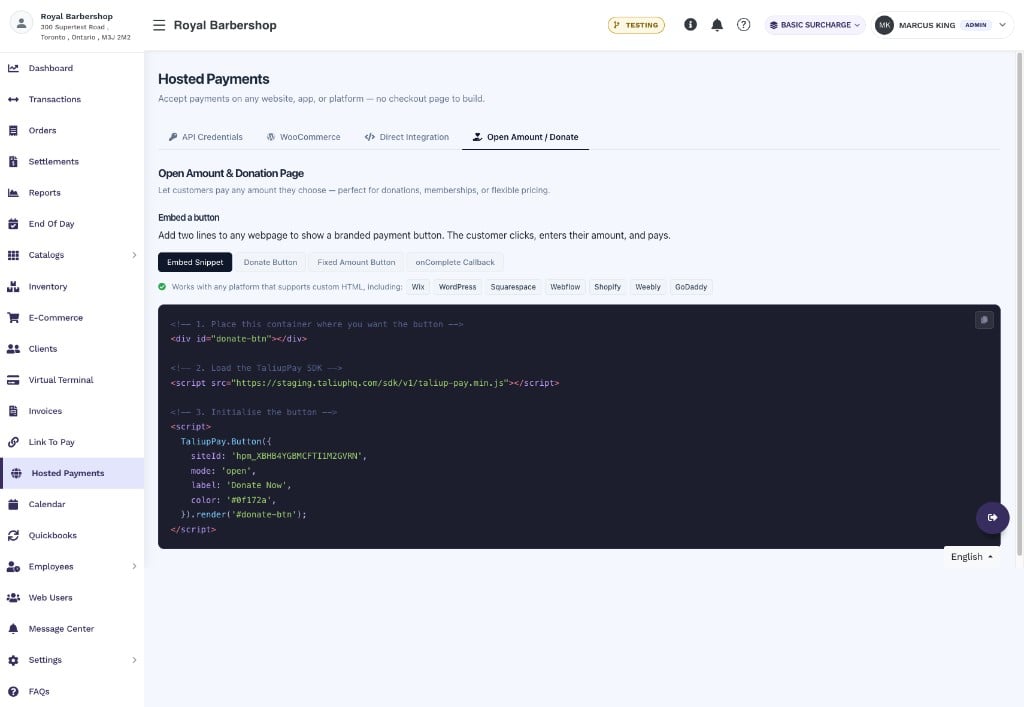
The Embed Snippet sub-tab — minimal two-line embed for any platform.
Donate Button
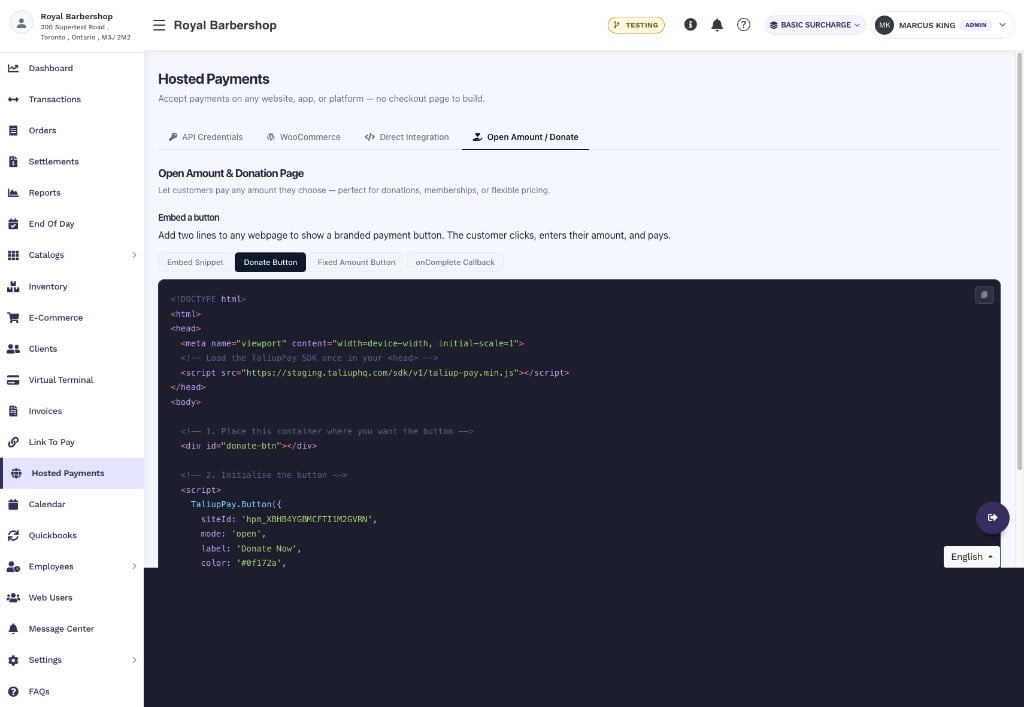
The Donate Button sub-tab — full HTML page example for an open-amount button.
<head> and an open-amount button initialised in <body>. The customer clicks the button, is taken to the Taliup landing page, enters their amount, and completes payment.
Fixed Amount Button
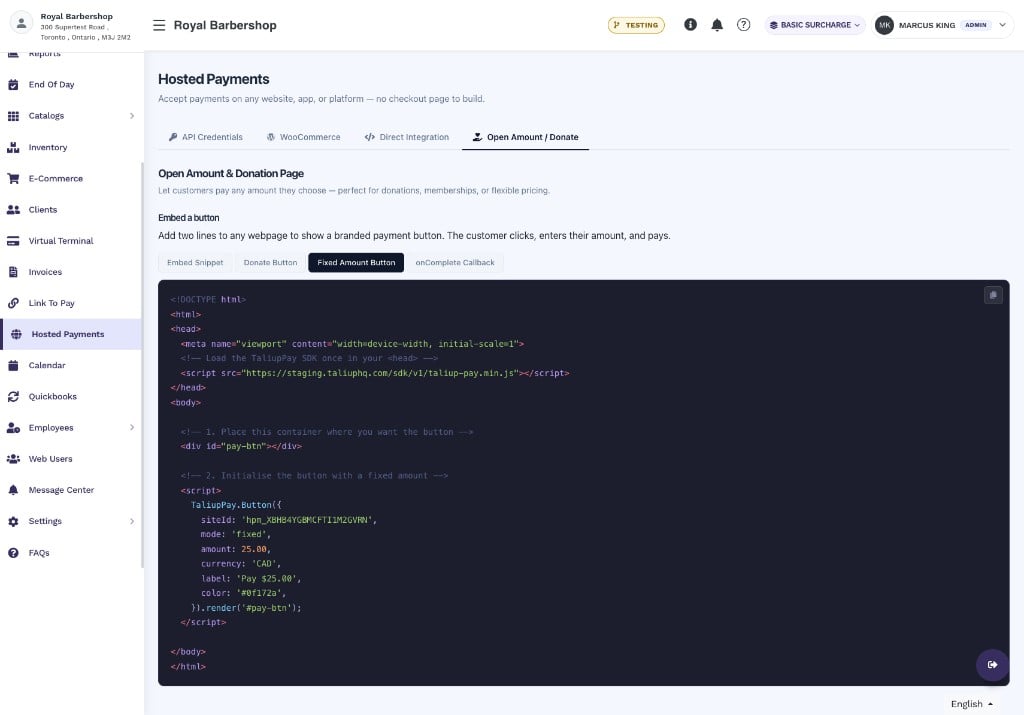
The Fixed Amount Button sub-tab — button that initiates a session for a pre-set amount.
mode: 'fixed' to charge a specific amount without requiring the customer to enter one:
onComplete Callback
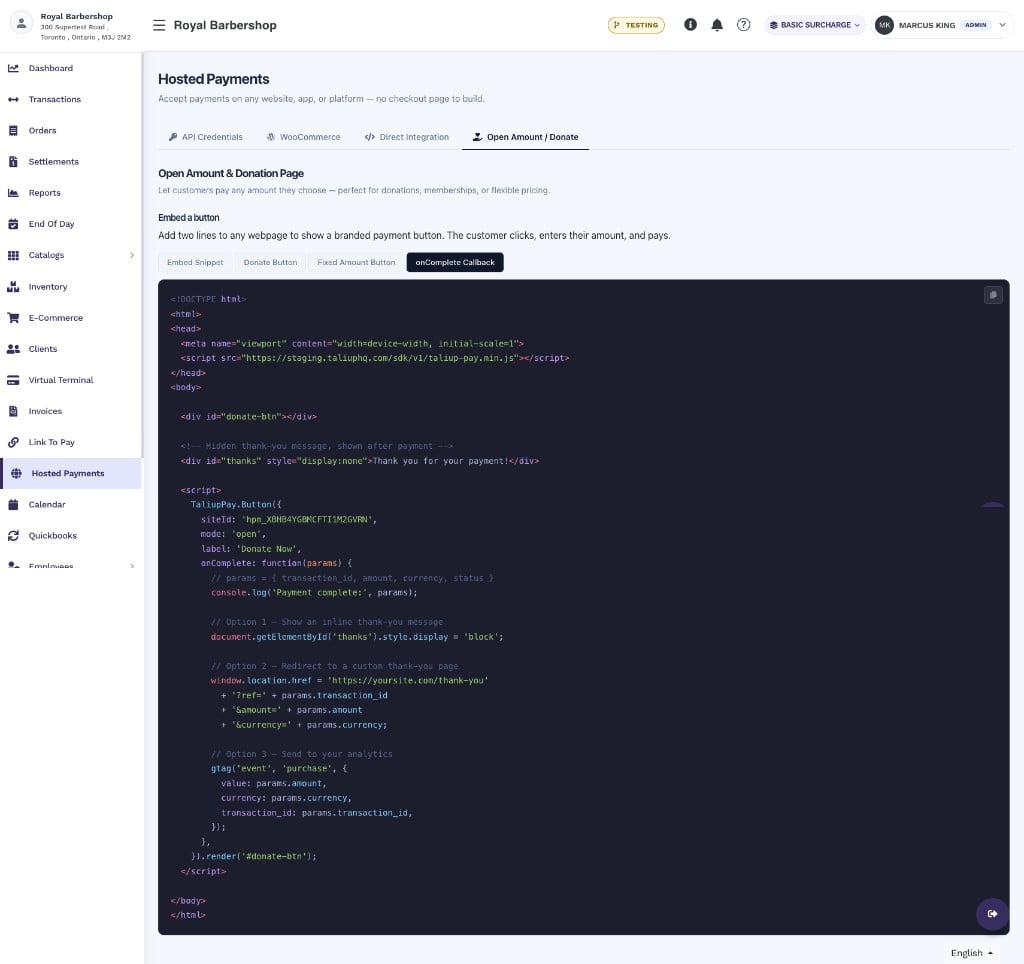
The onComplete Callback sub-tab — handle the payment result directly in the browser.
open and fixed mode buttons fire an onComplete callback when payment succeeds. The callback receives { transaction_id, amount, currency, status }:
Direct landing page URL
No embed required. Share this URL directly in an email, social post, or QR code — customers land on your branded Taliup payment page and enter their own amount:Webhooks
Webhooks deliver a signed server-to-server notification when a payment captures. They apply to the Direct Integration flow — passwebhook_url in your createCheckoutUrl request.
Webhook payload
Verify the signature
Every webhook includes anX-Taliup-Signature header. Always verify it before processing the payload: