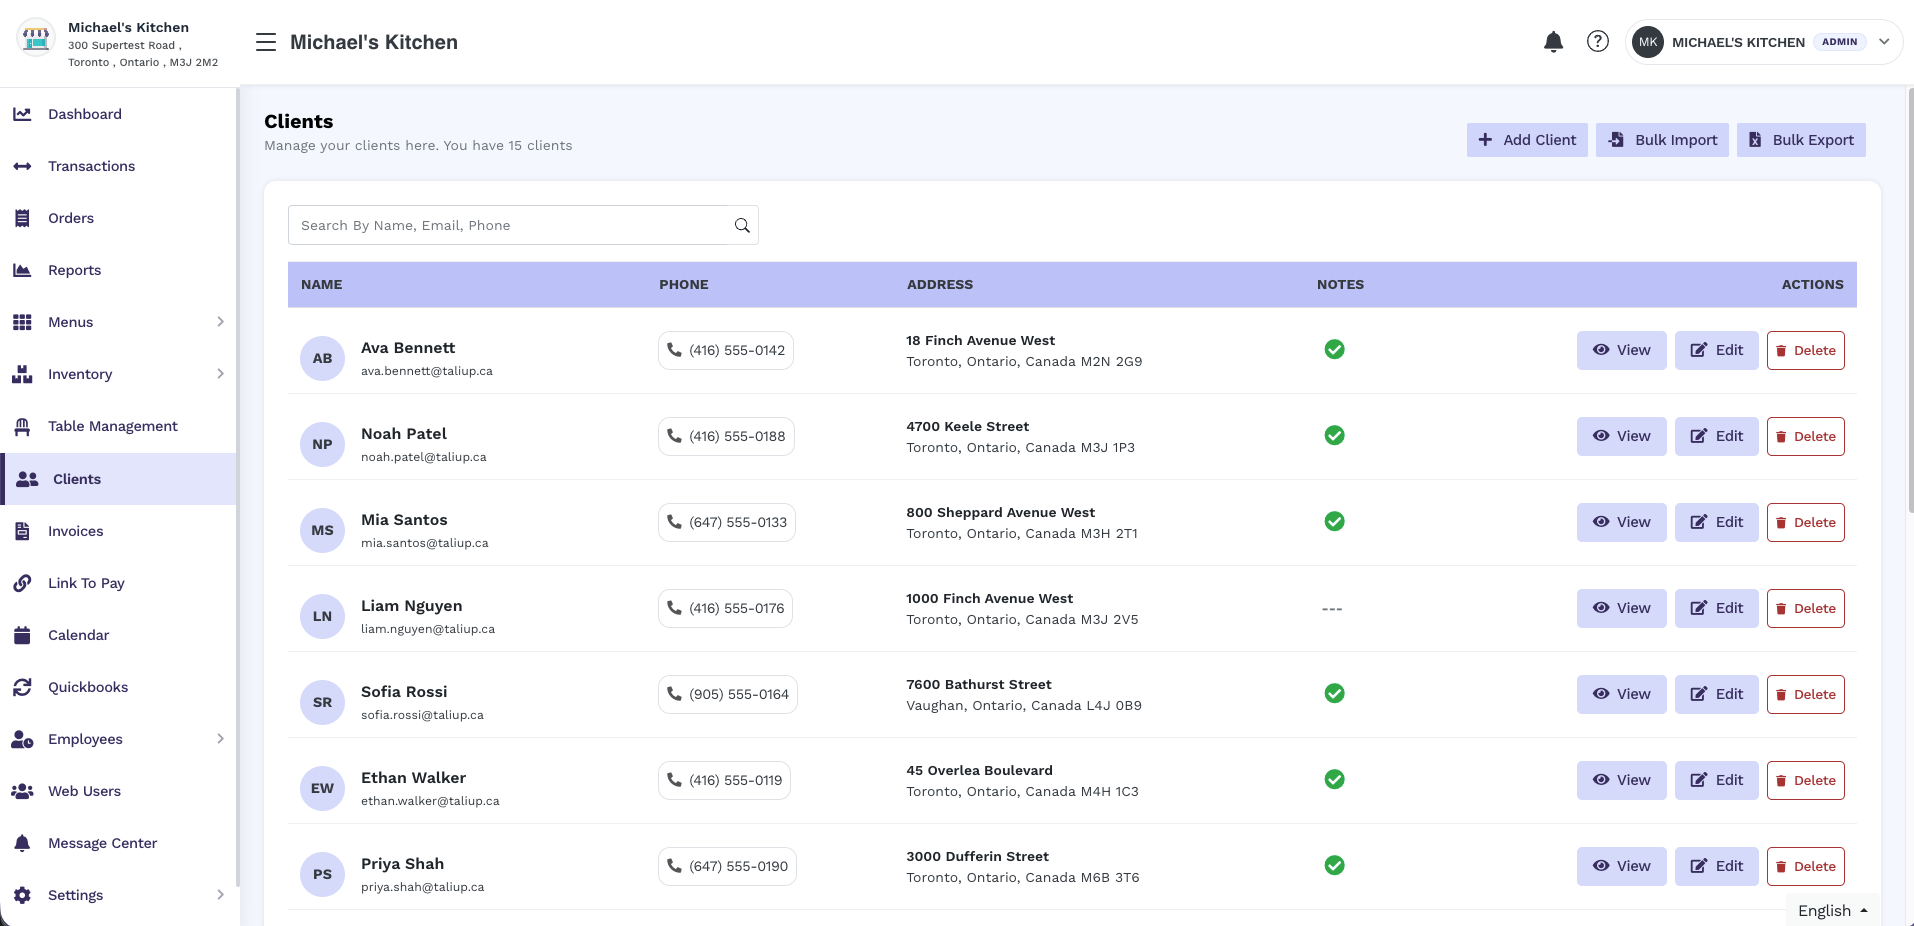
The Clients list with search, Add Client, and bulk import.
Prerequisites
The Clients feature must be enabled on the entity plan. Ask your ISO admin to enable it in Plans & Features if you do not see Clients in the sidebar.Create a client
1
Open Clients
In the merchant sidebar, click Clients, then Create (or Add Client).
2
Enter details
Fill in First Name, Last Name, and Email. Phone, address, business name, and notes are optional.
3
Save
Click Add Client.
Restore a deleted client
Deleting a client hides the record. It does not permanently remove their history. If you create a client again with the same email on the same entity, Taliup finds the previous record and asks you to restore it.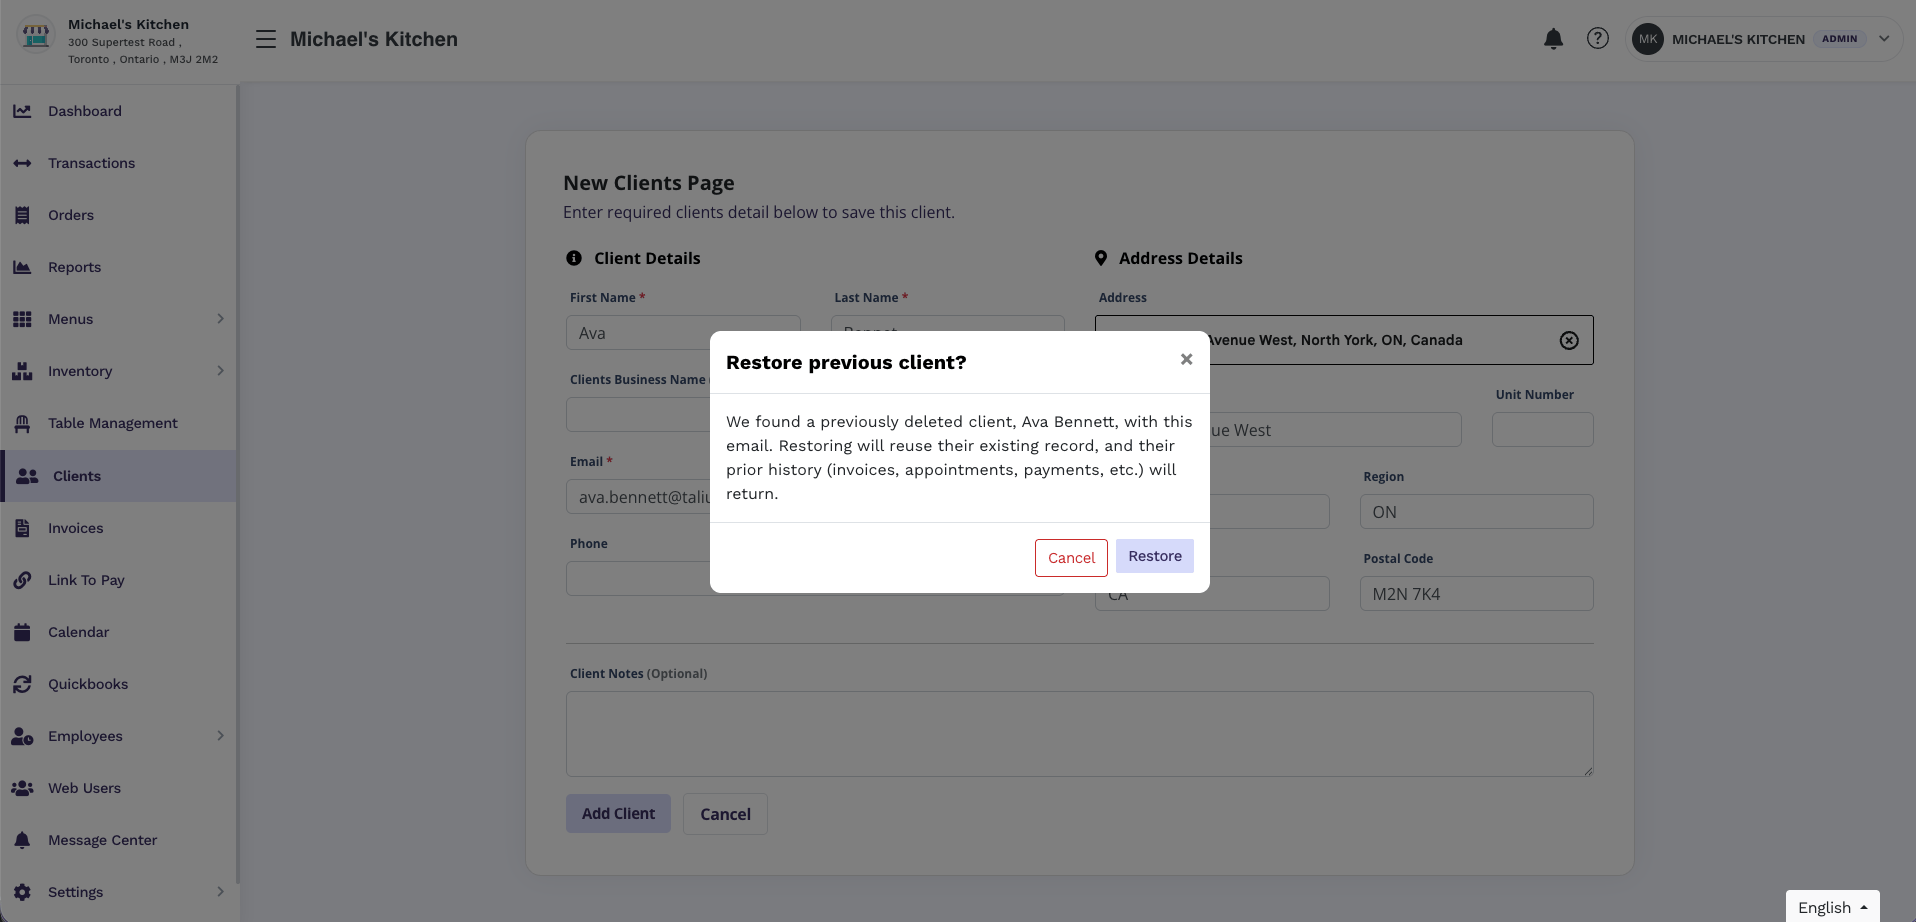
Restore previous client confirmation after reusing a deleted email.
1
Add the client again
Use Clients → Create, or Add Client from an invoice, Recurring Payments, Link to Pay, Calendar, or Virtual Terminal. Enter the same email as the deleted client.
2
Confirm the restore
When Taliup finds a match, it shows Restore previous client? The message names the previous client and explains that restoring reuses their record and brings back invoices, appointments, payments, and other history.
3
Restore or cancel
Click Restore to reuse that client. Click Cancel to leave them deleted and stay on the form.
- The client keeps the same record (not a second copy of the same email).
- Name and phone from the new form replace the old values.
- Prior invoices, appointments, and payments stay attached.