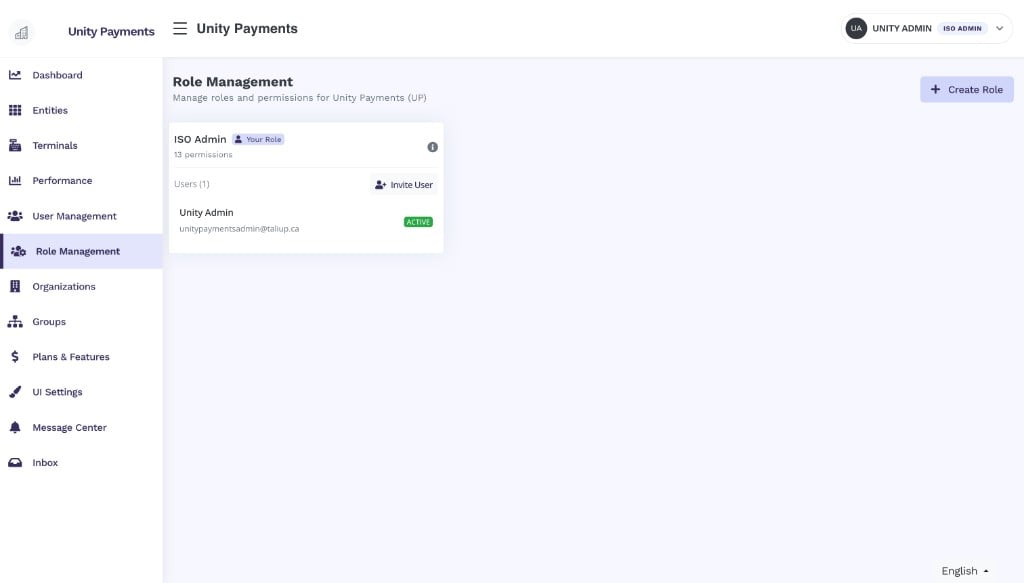
The Role Management page showing the ISO Admin role card with its permission count, user list, and Invite User button.
This page requires the Role Management permission. Your own active role is labelled Your Role and cannot be edited or deleted — this prevents accidental self-lockout. Only custom roles you have created can be modified or removed.
Role cards
Each role appears as a card on the page. A card shows:- Role name — with a Your Role badge if it is the role currently assigned to you
- Permission count — the number of feature permissions granted to this role
- Users list — every user assigned to this role, with their name, email, and status badge (Active or Pending)
- Invite User button — opens the invitation modal pre-set to this role
- Edit / Delete controls — visible only on custom roles you are permitted to modify
Creating a role
Click + Create Role in the top-right corner to open the Create New Role modal.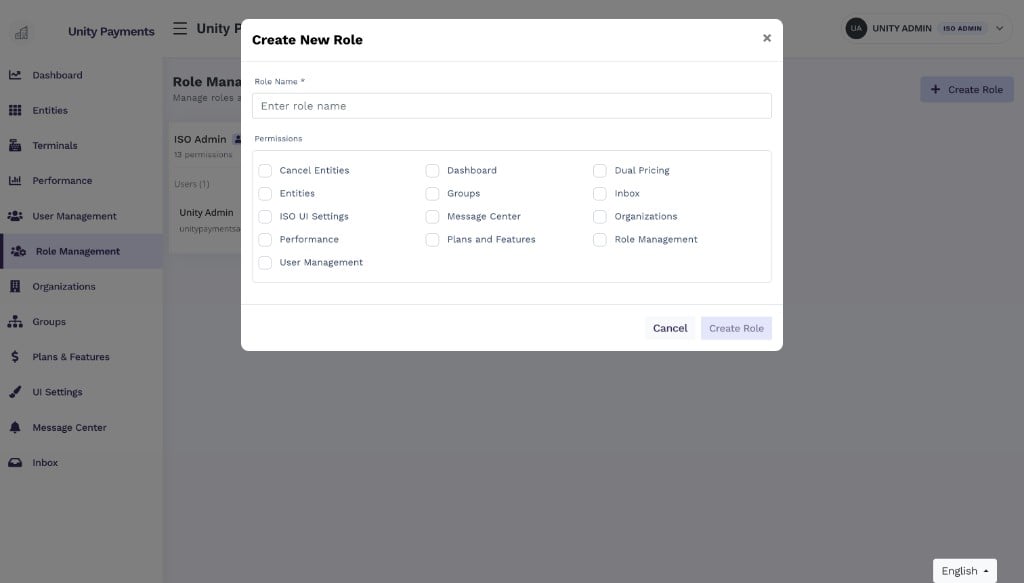
The Create New Role modal showing the Role Name field and the full list of available permissions.
Click Create Role to save. The new role card appears on the page immediately.
Available permissions
Editing and deleting a role
Roles you created (custom roles) show Edit and Delete controls on their card. Built-in roles such as ISO Admin and your own current role are protected and cannot be modified. When you edit a role’s permissions, the system immediately rebuilds the permission cache for every user holding that role — their access updates without requiring them to log out.Inviting a user
Click Invite User on any role card to open the Invite New User modal. The Assign Role field is pre-set to the role whose card you clicked.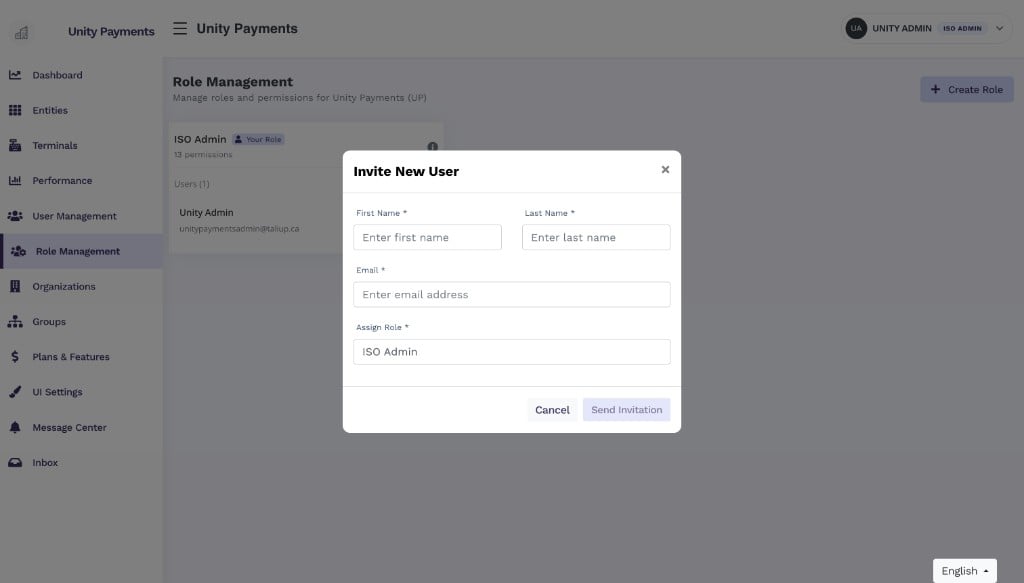
The Invite New User modal with fields for First Name, Last Name, Email, and Assign Role pre-filled to ISO Admin.
Click Send Invitation to create the account and dispatch the invitation email. The new user appears in the role card with a Pending status badge. They will receive an email with a secure link to complete their account setup and set their password.