> ## Documentation Index
> Fetch the complete documentation index at: https://docs.taliuphq.com/llms.txt
> Use this file to discover all available pages before exploring further.
# Locations
> Manage physical merchant sites, Merchant IDs (MIDs), currency, and online payment gateway credentials in Taliup HQ.
A **Location** represents a physical merchant site. Each location is tied to a **Merchant ID (MID)**, which links it to payment processing and manual settlement. A merchant can have multiple locations, each with its own MID and gateway configuration.
Click **Add Location** to create another site. This is available for **PAX**, **Poynt**, **Castles**, **Ingenico**, and **None** terminal providers.
For **Poynt**, stores synced from Poynt HQ still appear first. Locations you add in Taliup HQ that are not on poynt.net are **companion locations**. They stay on the list so you can attach online gateways, device types, and extra sites that Poynt does not sync.
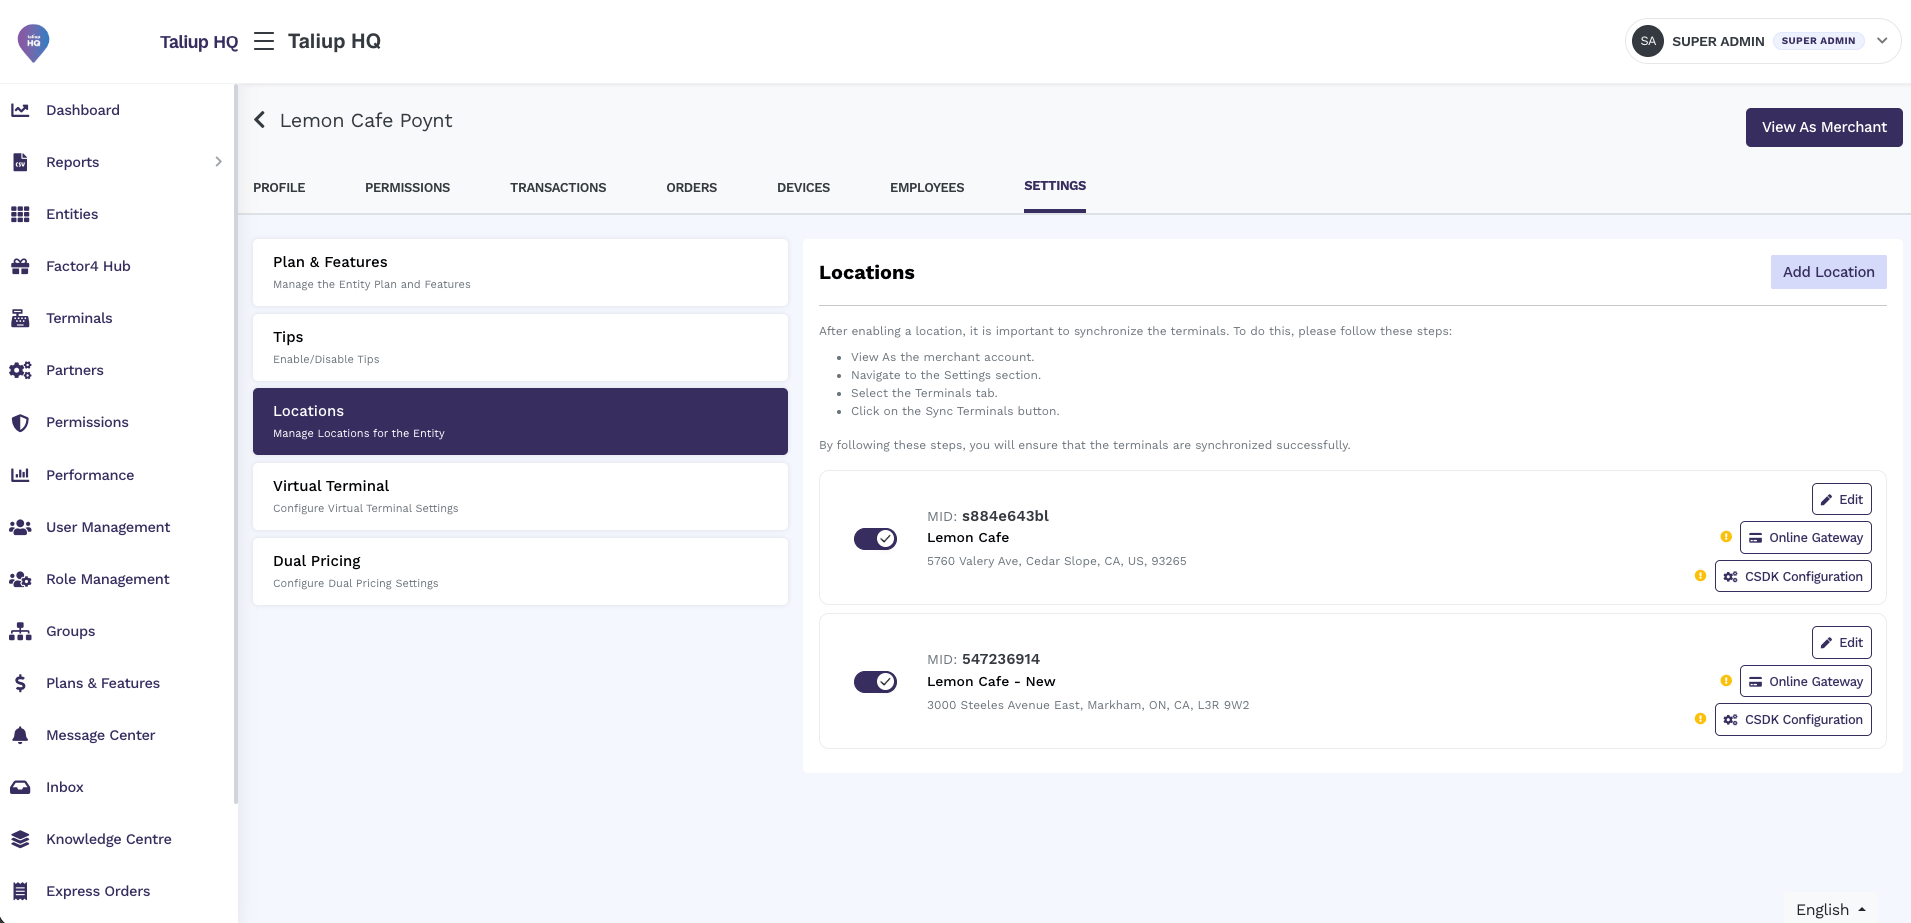 After you enable a Poynt location, **View As** the merchant, open **Settings → Terminals**, and click **Sync Terminals**.
## How to get here
**Entities** → find the Entity → **Manage** → **Settings** → **Locations** tab.
## Edit a location
From the **Settings** page, click the **Locations** tab.
Find the location you want to update and click **Edit**.
Update the location name, address, currency, or MID as needed. Ensure all required fields are complete.
Click **Save Changes**.
The **MID** is tied to the merchant's ability to run **Manual Settlements**. Changing the MID breaks the settlement history for that location. Only change the MID if you are intentionally migrating the merchant to a new processing agreement.
## Enable and disable a location
A location is enabled by default. An ISO Administrator can disable a location at any time.
Disabling a location **immediately locks all PAX devices assigned to that location out of Taliup POS**. Re-enable the location to restore access.
## Online Payment Gateway
Each location can have an online payment gateway attached to it. Online gateway credentials are associated with the location's MID and must be obtained from the acquirer or online payment gateway provider.
After you enable a Poynt location, **View As** the merchant, open **Settings → Terminals**, and click **Sync Terminals**.
## How to get here
**Entities** → find the Entity → **Manage** → **Settings** → **Locations** tab.
## Edit a location
From the **Settings** page, click the **Locations** tab.
Find the location you want to update and click **Edit**.
Update the location name, address, currency, or MID as needed. Ensure all required fields are complete.
Click **Save Changes**.
The **MID** is tied to the merchant's ability to run **Manual Settlements**. Changing the MID breaks the settlement history for that location. Only change the MID if you are intentionally migrating the merchant to a new processing agreement.
## Enable and disable a location
A location is enabled by default. An ISO Administrator can disable a location at any time.
Disabling a location **immediately locks all PAX devices assigned to that location out of Taliup POS**. Re-enable the location to restore access.
## Online Payment Gateway
Each location can have an online payment gateway attached to it. Online gateway credentials are associated with the location's MID and must be obtained from the acquirer or online payment gateway provider.
 From the **Locations** tab, find the location and click **Online Gateway**.
Select the **Payment Gateway Provider** from the list.
Fill in the required fields for the selected payment gateway (credentials are provided by the acquirer or gateway).
Select **Live** for production payments. If the gateway supports it, select **Sandbox** to use test cards with card-not-present features enabled for the merchant.
Toggle **Active** on to enable online payment processing for this location. Toggle it off to suspend online processing without removing the gateway configuration.
Click **Save Payment Gateway**.
From the **Locations** tab, find the location and click **Online Gateway**.
Select the **Payment Gateway Provider** from the list.
Fill in the required fields for the selected payment gateway (credentials are provided by the acquirer or gateway).
Select **Live** for production payments. If the gateway supports it, select **Sandbox** to use test cards with card-not-present features enabled for the merchant.
Toggle **Active** on to enable online payment processing for this location. Toggle it off to suspend online processing without removing the gateway configuration.
Click **Save Payment Gateway**.